Apple MapView In Xojo
Stefanie presents how to use maps in your Xojo application on macOS and iOS with MBS Plugins.
Welcome
You can see Stefanie and some information
Welcome to this video. My name is Stefanie Juchmes and I am junior developer at Monkey Bread Software. Today I want to show you how you can integrate maps based on Apple Maps into your Xojo applications.
Arriving right is always important, so it is good if you can incorporate navigation into your applications.
You can use the map integration I show you where not only in your desktop app on Mac, but also use it in your iOS apps. To use the classes and functions,
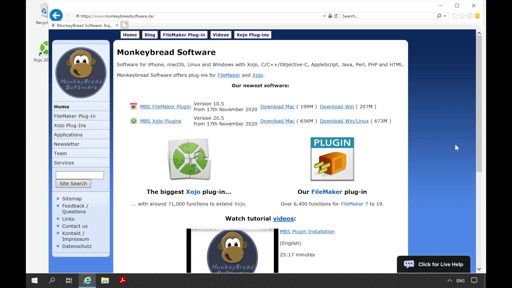
we need the MBS Xojo MacFrameworks Plugin from the MBS Xojo plugin collection.
You can watch the linked videos to learn how to install the plugin and what else you can do with the 77,000+ functions from the MBS Xojo Plugins.
Now let's begin our journey with Apple Maps.
Fade to the app
What can you do with Mapview
Before I show you HOW you can incorporate the individual functions of the Mapview into your application, I will first show you in an example WHAT you can do with the functionalities. Afterwards we will program this app together.
We have here our map view in which we can move. We can change the position on the map and zoom. The streets are well visible in the current map view, but whether our destination is in a forest or not, we can not see that at the moment. There are several different map views available, all of them having their own advantages.
Click on the buttons for the card types
MutedStandard is similar to Standard, but only the most important things are shown and the markings are kept simple.
Satellite mode has the advantage that the terrain is visible. However, no locations or street names are visible. This makes orientation a bit more difficult.
The SatelliteFlyover is similar to the Satellite mode, except that the map is displayed as a sphere. This shifts the proportions of a larger section based on the curvature of the earth.
Hybrid: Shows the terrain and the roads. The roads are then overlayed on the terrain profile. So the best of both worlds terrain and orientation are combined.
As you can imagine, the Hybrid Flyover is like the Hybrid mode, except that the proportions are based on the globe.
The map typ is not the only thing you can change about the map display. You can turn on and off some handy displays, so you can see your current position on the map.
Check my location
Especially if you also walk around the city and use the application on your phone it can be handy to have stores and points of interest displayed, so you can activate the points of interest.
Check points of interest
In the standard map mode you can also show the outlines of the buildings.
Check buildings
If you plan a route manually, it can be useful to have an overview of the traffic. With ShowsTraffic we show the traffic volume.
Check traffic
Rush hour traffic and road closures are shown directly with colors on the map, so that a better manual route planning is possible.
We can also show and hide various controls for working with the map.
Check Zoom Control
We can show the zoom controls at the bottom right of the screen to make zooming easier,
or
Check Compass
the compass with which we can align and rotate the map.
Check Scale
We can also show the scale in the upper left corner to get a better feel for the distances on the map.
Of course, it is also nice if we can take a picture of the map section. You can take a snapshot of your map and save it to a specific location.
But we don't only want to look at maps, we also want to work with them, so we can search for a certain address
Enter London in the search box
or calculate and draw a route from our location.
Clicked the From My Location button and got the address of my location. Then we enter the destination Bonn and calculate the route
You can choose whether the route should be calculated for a car or a walking person.
You can also make marks on your map using overlays, such as polygons and circular overlays, or mark locations with pins.
I will now show you how you can integrate these many functionality into your solution.
Crossfade
Insert a Mapview into your App
After you have installed the plugin we can start. To display a map we need the control MapKitViewControlMBS in our GUI.
Insert MapKitViewControlMBS
Just adding it to our GUI ensures that we can already view map sections. We can also zoom with the mouse or the trackpad. To be able to add more functions we first create a property of type MKMapViewMBS.
Property in the window:mapview as MKMapViewMBS
Now we create the open event of the mapview and pass the view of the mapview control to the property we just created.
MapView OpenEvent: Self.mapview = Me.View
If we now want to address the view in the further we do it via the property.
Maptypes
We now want to be able to switch between the map modes. To do this, we add a DesktopSegmentedButton control to our window,
Add DesktopSegmentedButton to the GUI
We label it with the terms Standard, Muted Standard, Satellite, Satellite Flyover, Hybrid and Hybrid Flyover. To change the view we set the property map type of the map. The value to pass is of type integer but can also be specified via a predefined constant, which of course makes our code a bit more readable.
In the click event of the segment button we start with a case and describe the individual cases that are triggered when a certain button is pressed.
Clickevent Button Bar
Select Case segmentIndex
Case 0
  mapview.mapType = mapview.MapTypeStandard
Case 1
  mapview.mapType = mapview.MapTypeMutedStandard
Case 2
  mapview.mapType = mapview.MapTypeSatellite
Case 3
  mapview.mapType = mapview.MapTypeSatelliteFlyover
Case 4
  mapview.mapType = mapview.MapTypeHybrid
Case 5
  mapview.mapType = mapview.MapTypeHybridFlyover
End Select
Properties for Map displaying
We have many different properties available with which you can customize the display of your maps. For example, next to our map we can create a series of checkboxes that can turn on and off the individual options.
Add checkboxes
For each setting, the code looks similar. For example, we write the code of the ValueChanged event that can be used to show or hide the traffic.
ValueChanged Event:
If Me.Value Then
  mapview.showsTraffic = True
Else
  mapview.showsTraffic = False
End If
We set the property showsTraffic to True or False. This is exactly how we can set the other properties for the display.
Snapshots
Now we come to the snapshot function for which we placing a button in the window and which should place our map section as an image on the desktop.
Open pressed event
We need an object of the class MKMapSnapshotOptionsMBS which we can pass in different properties how the map should look like.
Var options As New MKMapSnapshotOptionsMBSFirst of all we specify which map type should be used when displaying the map. We specify the type of map that is currently being displayed
options.mapType = mapview.mapTypeWe also specify the region, the map section and whether the points of internst and the buildings should be displayed.
options.region = mapview.region
options.mapRect = mapview.visibleMapRect
options.size= NSMakeSizeMBS(map.Width,map.Height)
options.showsPointsOfInterest = Check_POI.Value
options.showsBuildings=Check_B.Value
As you can see, to create an image from a map section, we do not necessarily need a mapview control. You can also pass the information directly. After we have set the options. We can now create an object of the class MKMapSnapshotterMBS and pass the options in the constructor
Var snap As New MKMapSnapshotterMBS(options)We then use the start method to start the asynchronous snapshot process
snap.StartWe have to wait until the image has finished loading.
While snap.Loading
  app.DoEvents 20
Wend
After completion of the process, we have an object of the class MKMapSnapshotMBS in the Snapshot property of snap and can now query the image there.
Var n As NSImageMBS = snap.Snapshot.ImageWe can then write this image on our desktop.
If n <> Nil Then
  Var f As FolderItem = SpecialFolder.Desktop.Child("test.png")
  Var b As BinaryStream = BinaryStream.Create(f, True)

  b.Write n.PNGRepresentation
End If
Find an address
For displaying an address on the map we have the method showAdress,
ShowAdress method from the documentation
To which we pass the address as a parameter. In our example,
Fade to app
We want to specify the address in a text field. The search is started via the button we place below it. We use the method in the pressed event of the button. The function showAdress will also automatically zoom to the searched address.
mapView.showAddress SearchText.Text
Determine your own location
We can show our own location with the blue dot,
but if we want to calculate a route, we need the exact location as an address.
For this we can use the functions of the CoreLocation section of the MBS Xojo Plugins.
With these functionalities we can determine our current location.
Because we want to work with events we have to create a class of type CLLocationManagerMBS.
We call it MyLocationManager.
Create class MyLocationManager of type CLLocationManagerMBS
In our window we position a button and a text field in which our address will appear. We also create a property in the window with the name myLocation of the type MyLocation Manager. In the code behind the button, we first check whether we can query a location with this device at all and whether we have the authorization to access the location at all.
If Not MyLocationManager.locationServicesAvailable Then
  MsgBox "Location Services are not available."
End If

If Not MyLocationManager.locationServicesEnabled Then
  MsgBox "Location Services are not enabled."
End If
Then we can link our property in the window with the newly created class
LocationManager = New MyLocationManagerBefore we start the query of the location we set the accuracy with which our location should be determined
LocationManager.desiredAccuracy = CLLocationMBS.we have different settings to choose from
LocationManager.desiredAccuracy = CLLocationMBS.kCLLocationAccuracyBestand then start updating the current position
LocationManager.startUpdatingLocationIf we have now determined a new location, the didUpdate event of our MyLocationMenager class triggers.
Go to didUpdate event
We can then stop the request for the current position, because we already have the wanted information.
Window1.LocationManager.stopUpdatingLocationWe do not have the location as an address yet, but as latitude and longitude, which we can read
Var Latitude  As Double = newLocation.Latitude
Var Longitude As Double = newLocation.Longitude
To convert this coordinate into an address we need the geocoder. If we determine the address to the coordinates we work again with events of a class. For this reason we must store the geocoder in our program in such a way that we can also access it outside of a specific code. For this reason we store the geocoder as a property in the main window
Create property in main window geocoder of type CLGeocoderMBS
and store an object of the CLGeocoderMBS class in this property.
Go back to didUpdate event
Window1.geoCoder = New CLGeocoderMBSTo know when the address determination is completed we need the class MyCLGeocodeCompletionHandlerMBS in our project, which gets the super class CLGeocodeCompletionHandlerMBS. The Completed event fires when the address determination is complete.
Create class MyCLGeocodeCompletionHandlerMBS with superclass CLGeocodeCompletionHandlerMBS
We now create such an instance in the code
Var g As New MyCLGeocodeCompletionHandlerMBSthen we create an instance of the CLLocationMBS class and pass longitude and latitude of our current position.
Var Location As New CLLocationMBS(Latitude, Longitude)Now we call the method reverseGeocodeLocation which should give us the address to the coordinates. We pass in this method the location and our Completion Handler.
Window1.geoCoder.reverseGeocodeLocation(location, g)The Completed event fires when the address is determined.
Open Completed event of MyCLGeocodeCompletionHandlerMBS class
The result is an array of placemarks. We only need one of these addresses and for this reason we only want to use placemark 0.
Var placemark As CLPlacemarkMBS = placemarks(0)We then compose the address from the displaced information we get from the Placemarks object.
var MyAddress As String = placemark.name + ", "+ placemark.locality +", " + placemark.countryWe enter this address in the field that we have provided for this purpose and display the address on the map.
 Window1.mapView.showAddress MyAddress
Window1.SearchText.Text = MyAddress
Crossfade to the window with the text fields and buttons for the route
We have three buttons in the whole project that query the user location as an address and process it differently. Once the button that writes the address in the start field for the route calculation, a button that writes the address in the belonging destination field and the button that we have just created together. Each of these buttons should get their own mode, which we store in a property in the main window.
Create property mode of typ integer
We set the property during the process to one two or three to know in the events how we have to proceed. So we build in the two used events suitable If and else If conditions.
If Window1.Modus = 1 Then
  Window1.mapView.showAddress MyAddress
  Window1.SearchText.Text = MyAddress

ElseIf Window1.Modus = 2 Then
  Window1.RoutTextStart.Text = MyAddress


ElseIf Window1.Modus = 3 Then
  Window1.RoutTextDestination.Text = MyAddress
In the event didUpdate for the modes 1-3 always the same will be done, the location of the user will be determined. Nevertheless, we need this case distinction immediately for our route calculation. We must of course also set the mode in the pressed events of the buttons.
Window1.LocationManager.stopUpdatingLocation

Var Latitude  As Double = newLocation.Latitude
Var Longitude As Double = newLocation.Longitude

Window1.geoCoder = New CLGeocoderMBS
Var g As New MyCLGeocodeCompletionHandlerMBS

If Window1.Modus <= 3 Then

  Var Location As New CLLocationMBS(Latitude, Longitude)

  Window1.geoCoder.reverseGeocodeLocation(location, g)

 end if
Mode setting in the three buttons
Planing a Route
We also want to implement the function that we can calculate a route. The individual route steps should be listed and the individual routes should be drawn on the map. So that we can calculate a route, the start and destination points must be available as coordinates, which means we must now go the other way around and convert an address into coordinates. For this we also need the GeoCoder. If we want to plan a route, the property mode should contain a 4. The start and destination address are in the corresponding text fields. Before we can calculate the route, we need the coordinates to the start and destination address, these must be calculated one after the other. So we first get the coordinates of the start and then of the destination and then we calculate the route. We put agin an instance of the class CLGeocoderMBS in the already known property geocoder
geoCoder = New CLGeocoderMBSand define a completion handler.
Var g As New MyCLGeocodeCompletionHandlerMBSOf course, we also specify the mode here.
Modus = 4This time we call the method geocodeAddressString instead of reverseGeocodeLocation which returns the coordinates for an address.
Window1.geoCoder.geocodeAddressString…We pass the start address and the completion handler in this method.
Window1.geoCoder.geocodeAddressString(Window1.RoutTextStart.Text, g)Again the event Completed of the specified completion handler fires. Now we add the distinction that that the mode is equal 4.
ElseIf Window1.Modus = 4 ThenWe get from the first placemark the information. Get location.latitude and location.longitude.
Var latitude As Double = placemark.location.Latitude
Var longitude As Double = placemark.location.longitude
Now we store this as a coordinate as a new object of the CLLocationCoordinate2DMBS class.
Var Coordinate As New CLLocationCoordinate2DMBS(latitude,longitude)We have to differentiate our procedure, because the event does not know whether we have just converted the start address or the destination address into coordinates. For this reason we create a property Complete of type boolean in the main window, which is only set to True when the destination address is passed to the completion handler.
Create property Complete of type Boolean
So if complete is False, then
If Window1.complete = False Thenthe determined coordinates from the start are stored in a property in the main window. Then we start a method in the main window which we will write in a moment and which will then convert the destination coordinate.
Window1.Start = Coordinate
Window1.PrepareForRout
When we arrive here in the code with the Destination coordinate, the destination coordinate should be stored in the main window property Destination instead and another method will be called
 Else
 	Window1.Destination = Coordinate
	window1.CalculateRout
  End If

End If
We now first write the method that converts our destination address into coordinates. We call this method PrepareForRout.
Create method PrepareForRout in the window
First we set the property Complete to true, so that we know in the completion handler event Complete where to go on.
complete = TrueThen the address conversion to the coordinates is done the same way as we just saw with the start coordinates.
geoCoder = New CLGeocoderMBS
Var g As New MyCLGeocodeCompletionHandlerMBS

Window1.geoCoder.geocodeAddressString(Window1.RoutTextDestination.Text, g)
In the Completed event, the coordinates would then be written to the Destination property and the next method, CalculateRout would be called. We still need to write this one as well
Create method CalculateRout in the window
Before we forget we set Complete back to False for a next run
complete = FalseWe have our coordinates of type CLLocationCoordinate2DMBS. But to work with them we need them as MKMapItemMBS objects. For this reason we need to convert them. But there is no constructor to the class MKMapItemMBS that accepts CLLocationCoordinate2DMBS. For this reason we convert them to MKPlacemarkMBS objects in an intermediate step. Maybe you think now. Wait Placemaks we just had that as a value in Completion Handler and then we converted it to CLLocationCoordinate2DMBS why now agin? Here we have to pay attention. We had placemaks that related to CoreLocation. Now we have placemarks that relate to Mapkit, so we are dealing with two absolutely different classes.
Var p1 As New MKPlacemarkMBS(Start)
Var p2 As New MKPlacemarkMBS(Destination)
Now comes the conversion to mapItems.
Var i1 As New MKMapItemMBS(p1)
Var i2 As New MKMapItemMBS(p2)
Now we can finally start planning the route. First we have to make some settings for the route, we create an object of the class MKDirectionsRequestMBS.
Var request As New MKDirectionsRequestMBSWe fill this with information. We define our transport type again with a button bar. If the button with the index zero or nothing is selected, the transportation typ should be the car, if the button with the index 1 is selected, it is a footpath.
If Transport=1 Then
  request.transportType = request.TransportTypeWalking
Else
  request.transportType = request.TransportTypeAutomobile
End If
Then we set the start and destination
request.source = i1
request.destination = i2
If we want to have more than one route displayed, we set requestsAlternateRoutes to true.
request.requestsAlternateRoutes = TrueAgain, we need the help of events for the route calculation. So we create the class MKDirections of type MKDirectionsMBS. The event calculateDirectionsCompleted fires when the paths calculation is done.
Create MKDirections class and return to code
We want to store our paths in the Directions property in our window
Create directions property of MKDirections class in the window
Directions = New MKDirections(request)Then we say where the list of routes should be displayed afterwards
Directions.list = listFinally, we call the method that calculates the route.
Directions.calculateDirectionsWhen the routes have been calculated, the calculateDirectionsCompleted event fires.
Go to calculateDirectionsCompleted method
In this event we get as input values, the response containing the routes, the errors that may have occurred during the query and the tag. We first check if there was an error while calculating the routes
If error <> Nil Then
  MsgBox error.LocalizedDescription
end if
Then it's time to tidy up the map, get all the overlays as an array and remove them from the map.
Var remo() As MKOverlayMBS = Window1.mapview.overlays
Window1.mapview.removeOverlays(remo())
We do the same with the annotations.
Var Annot() As MKAnnotationMBS = Window1.mapview.annotations
Window1.mapview.removeAnnotations (Annot())
To display the entries of the routes later we have to empty the list.
list.RemoveAllRows
Window1.list.RemoveAllRows
Thus, everything is prepared and freed from legacy. Next, we check whether there are calculated routes.
If response <> Nil ThenIf there are any, then we want to create an array with the routes. And process each route individually in a loop.
Var routes() As MKRouteMBS = response.routes
Var i As Integer= 0

For Each route As MKRouteMBS In routes
For the sake of clarity, we would like to draw only the first route on the map. If it is the first route, so i=0 Then we want to draw the route on the map
If i= 0 ThenFor this we create a new reinerer object of the class MKMultiPolylineRendererMBS and pass it the polylind of the route.
Var renderer As New MKMultiPolylineRendererMBS(route.polyline)This polyline, i.e. a route with multiple points, then becomes an overlay.
Var overlay As MKOverlayMBS = Renderer.overlayWe can then add this overlay to our map.
Window1.mapview.addOverlay(overlay)Because we want to start navigating at the starting position we zoom in to this address.
Window1.mapview.showAddress(Window1.RoutTextStart.Text)Now we set the start and end point on the map with a pin. We create an object of the class MKPointAnnotationMBS for this purpose.
//Start
Var start As New MKPointAnnotationMBS
We pass the coordinate
start.coordinate = Window1.StartSet the title and subtitle
start.title = "Start"
start.subtitle =Window1.RoutTextStart.Text
We can display a small popup with title and description next to the pins. the title in this case is start and the subtitle is the address Then we add the annotation on the map.
Window1.mapview.addAnnotation startWe do the same for our destination pin
Copy and adjust
//Destination
Var Destination As New MKPointAnnotationMBS
Destination.coordinate = Window1.Destination
Destination.title = "Destination"
Destination.subtitle =Window1.RoutTextDestination.Text
Window1.mapview.addAnnotation Destination
   End If
Now we have to make sure that the individual route steps are also entered in the list for this. First of all we have to allow the list to expand single rows.
list.AllowExpandableRows = TrueSo we can display the route name and the travel time above.
list.AddExpandableRow route.name+" with "+Str(route.expectedTravelTime/60)+" minutes“As subitems we can then pass the route.
list.RowTagAt(list.LastRowIndex) = routethen we start the loop again
      i = i + 1
  Next
end if
This completes our programming for route planning and we can use it
Perimeter around own Location
Last but not least, we want to set a radius around our current location. We would like to be able to specify this freely in a text field. So we put another button and a text field on our window.
Add text field and button
Here we also have to determine our location first. We can copy the code for this from the User button and only have to change the mode to 5.
Copy and adjust mode
We now have to go back to the didupdate event of our MyLocationManager. Here we build in the case for mode 5.
ElseIf Window1.Mode = 5 ThenWe call in this case a method which we pass the latitude and longitude.
Window1.Perimeter(Latitude, Longitude)We still need to write this method now.
Create method Perimeter with parameters lat as double, long as double
First of all we define the coordinate around which the circle should be drawn. We call this coordinate centerCoordinate. Then we save in a variable also the radius that we have in the filed. Here we have to take care that the method we want to use needs the value in meters. So if we want the user to enter the radius in kilometers we have to calculate the number again *1000.
Var centerCoordinate As New CLLocationCoordinate2DMBS (lat, long)
Var rad As Integer = Radius.Text.toInteger *1000
Now we create a new overlay with the method circleWithCenterCoordinate and our data.
Var circle As MKCircleMBS = MKCircleMBS.circleWithCenterCoordinate(centerCoordinate, rad)We then add this overlay to our mapview with addOverlay.
mapview.addOverlay circle
Ending
Fade to documentation
Now we have added all the features we saw in the beginning to our app.
There are many more things you can do with mapview, just have a look in our documentation what could be interesting for your program.
Have fun with the app and get creative with the MapView functionalities. If you have any questions about Mapview, feel free to contact me. I hope you enjoyed the presentation. Maybe we will meet in person at a conference. Thanks for watching.
Watch other Xojo videos:
 | MBS Xojo Plugin, XDC 2022 News (English) 41:08 minutes |
 | XDC Anywhere - MBS Xojo Plugins (English) 30:17 minutes |
 | MBS Xojo Plugin, June 2021 News (English) 27:58 minutes |
 | MBS Xojo Plugins 21.1 (English) 23:12 minutes |
 | Installing a Xojo Web App Server (English) 28:19 minutes |
 | MBS Plugin Installation Win (English) 22:03 minutes |